Tuesday, May 19, 2015
Pinned and Tried: DIY Boxwood Wreath with B&W Stripe Bow
Tuesday, April 8, 2014
April Teacher Appreciation {Thanks For Helping Our Students Grow!}
Friday, May 10, 2013
A few living room updates
Friday, April 19, 2013
Spring 2013 Inspiration: A Roundup of my latest
Friday, April 6, 2012
Easter Decor 2012 {part 1}
At the front door you might recognize my house-warming present to myself at the last home which I showed you how to make here {http://rebeccasroundup.blogspot.com/2011/08/hydrangea-housewarming-wreath-from.html?m=0}.
I'm still keeping up with my homemade Welcome Sign by switching out the ribbons each month which I blogged about here {http://rebeccasroundup.blogspot.com/2012/01/welcome-to-2012-no-cost-welcome-sign.html?m=0}
The vinyl tile was made by my lovely SIL with an entire set of cute tiles for the year. I'm excited to finally have the perfect place to display it on the entry console table. The country bunny and tree were a garage sale steals and the nest and greenery were cheap from Goodwill. A few nights ago I threw together the little egg ornaments using my girls stickers(!), a round paper punch, some ribbon scraps, and tape. {no cost!} My first thought was to buy some tree eggs on ebay but at this late in the game and not wanting to spend money, the wheels turned until I came up with this 'good enough' for now solution.
Across from the front door when you walk in you'll see the piano which I topped with a runner from Ikea and hung my mirror over as a lovely place for seasonal decor. Here I have my favorite garage sale topiaries {http://rebeccasroundup.blogspot.com/2011/05/my-2011-spring-style-setting.html?m=0}, my dollar store bird {http://rebeccasroundup.blogspot.com/2011/06/goodwill-dresser-and-dollar-store-bird.html?m=0}, my spring blocks I made last month {http://rebeccasroundup.blogspot.com/2012/03/spring-blocks-part-two-of-reversible.html?m=0}, and a garale sale Easter egg wreath. I got it last year right after Easter and it's so fun to finally put it up!
Then are my faux tulips I love. They just say Spring to me.
I hope you enjoyed part one of this post! Check back tomorrow to see the rest :)
Thursday, March 29, 2012
I Can Make That: Pottery Barn Rustic Bunnies
I went thrifting with a friend the other day and snagged this cute terra cotta bunny for $1 so I can give it a "weathered white glaze" and make it look just like these $39 - $49 "Rustic White Bunnies."
Not bad, eh? What inspires you?
Monday, March 19, 2012
Paper Pinwheel Wreath

My S-I-L loves Spring and is here today sharing this super adorable Pinwheel Wreath.
Hi! Thanks for letting me share today. I love 2 sided scrapbook paper and almost had to pinch myself when I saw the idea for this wreath. So let’s get started!


4. Take the left corner of each square and glue it to the middle of the square. Repeat with all the corners.

5. Place your wreath on the counter. Mine is 12” and is cut from foam core board.
6. Arrange your pinwheels and make sure they look great.
7. Glue your pinwheels on going around the wreath and kind of tucking them under each other as you go.

8. Glue a button to the center of each pinwheel.
9. Add a ribbon or a cloth to hang and enjoy.
Happy Spring it’s only 3 days away – but who’s counting?
Thursday, March 15, 2012
More St Patricks day blocks: Leprechaun Hat
Sunday, March 11, 2012
Spring Blocks {part two of Reversible Lucky Blocks Tutorial}
I absolutely love how these turned out! I cant wait to display them with some nice green topiaries and a jar of lemons or a sweet little bird and coordinating eggs.
You could also do the word "Easter." We chose "spring" because it works all season long. And since the papers coordinate on both sides, it wont be difficult to switch them within our decor for March and April.
Check back soon for one more St. Patty's day wood project, because I just can't get enough of these cute blocks!
Sunday, March 4, 2012
Lucky Blocks {DIY St Pattys Day Decor}
For this project you will need: wood blocks, scrapbook paper, paper corner rounder punch, paint, mod podge, brushes, vinyl lettering.
First cut your wood to the desired sizes. We did 6 blocks so that we could make them reversible (other side revealed in near future post!) but you could also do 5 blocks with one wood shamrock cut out.
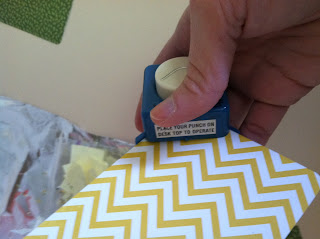
Then find whatever green scrapbook paper you'd like to use. Thicker is better when working with modge podge. Tip: look for reversible papers which make it easier to color coordinate. Cut to size to match blocks, deciding which order you'd like them in. Punch corners with rounder if desired.
Paint the sides and edges of blocks, the rest will be covered with paper. If you dont do reversible blocks and the backs are blank, I would paint the backs also. I chose to paint them an off-white because I wanted a very light, Springy look. My SIL painted them brown which looked great too. Let dry 15 - 20 minutes.
Apply a very thin coat of mod podge to block faces and let dry 15 - 20 minutes.
Apply another thin coat of mod podge this time to both the blocks and the back sides of the paper, making sure you coat the edges well, working quickly. Apply paper to blocks and rub down, making sure it is smooth, even, and there are no bubbles. I used a popsicle stick for this then went over it again with my fingers, especially for the edges of the paper. Let dry for 15 - 20 minutes.
Apply a thin-ish coat of mod podge to top of blocks, over paper and let dry 15 - 20 minutes.
When completely dry, apply vinyl letters and shamrock. Stand back and admire your finished project!


