Monday, September 29, 2014

Quick Fix: No sew up cycling a boys coat to a girls coat with flower embellishments

It's officially fall here. I went from wearing shorts last Thursday to needing to turn the heater on. It was time I went through the baby's clothes to see what kind of winter things she had. I found this little hoodie that belonged to her brother in perfectly good shape. But it needed some girly-ness. So I grabbed some fabric scraps and a hot glue gun (a hot glue gun???) and went to work.


If you've ever made fabric flowers before you know it's super easy. Just rip and roll, glueing as you go. Then I glued on top of the logo. I used hot glue because I am out of fabric glue, and seriously, have you ever accidentally gotten hot glue on your clothes? It's doesn't come off. So why not? C'mon, you know you've thought about it.


And there you have it.


And here is the "I'm-super-mad-that-you-would-even-think-about-putting-this-coat-on-me-right-now-so-I-am-gonna-fall-on-the-floor-and-throw-a-fit-but-I-don't-really-know-what-I-want-so-I'll-give-you-this-weird-smile-with-tears-in-my-eyes-while-you-make-funny-faces-at-me-so-you-can-get-a-picture" face. 


Have a super week! ~ Rebecca

Friday, September 26, 2014

The Friday Four Roundup #11 {Product Review and a Pinterest Fail}

I you haven't already, make sure to check out my Early Fall tour {here}. I say early because in a few weeks we will need to add some Halloween decor, and then my favorite, Thanksgiving!

1. Speaking of fall, not only did I add some touches to my house, I also found some super cure fall wallpaper for my "electronic devices." I just searched "fall wallpaper for iphone" on pinterest. When you see something you like on your phone you can just touch it and some options will come up and click "save image" which will go straight to your photo album on your phone. Then go to settings and update your wallpaper. Note: I could not save the image in my pinterest app, only if I went on pinterest through safari.


2. After doing a ton of research online and on the Ulta website, I discovered this Loreal true match mineral powder foundation got really great reviews. I decided to give it a try especially since I found that it was cheaper in my shade at Target.com than it was anywhere else, even Walmart. I LOVE it. I have tried BareMinerals for several years and also Loreal true match liquid foundation and this is very comparable to BareMinerals, if not better, and at less than half the price! I do need to use translucent powder to control shine over it, but it really gives a natural look and it so easy to use. (I am not paid to say any of this! All opinions in this post are my own!)


3. PINNED AND TRIED: homemade dry shampoo. After I ran out of my Suave dry shampoo, I decided to try this all natural recipe I found online by simply mixing equal parts baking soda and cornstarch. I found this shaker that was exactly like the one the original blogger used for like a buck. Umm, I don't know if it's just me, but it comes out way too much at a time, and pretty much made me look like I was trying to wear a powder wig. I only did it in a few spots that needed it. I rubbed it in like crazy and finally threw it in a ponytail to cover it because I was in a hurry. By the end of the day, the spots were really itchy and there was major powder under my fingernails from scratching. (gross). So I would say this is a Pinterest Fail. (!) Then I went and bought my beloved Suave dry shampoo. Definitely worth the three and a half bucks!


4. Lastly... "YOU'VE got mail. Those are very powerful words." (Name that movie) My awesome Sis in law Karen was so sweet to send me this mag after I told her I was wanting to read it but couldn't find it anywhere in my very small, very rural town. It really brightened my day. Now, go take a few minutes and go mail someone some love. You'll both be glad you did. And that's all for today's public service announcement.


I hope you have a great weekend! ~ Rebecca


Tuesday, September 23, 2014

Early Fall Decor 2014

Welcome to my place! After my children's urging we finally have the fall decor up. I think they know that pumpkins mean Halloween is around the corner! I like to keep it simple, with a few touches of things I already have, not spending money or tons of time.

Last week when we went on a drive up the mountains I collected these branches to add height to my front porch pots. Fast and free! I love the pop of fall color the flower pots and wreath add to the front of the house. Don't look to closely though, I know the mouldings and trim are in desperate need of repainting. I thought about doing it at the end of the summer but then decided it could wait until spring. There's just too much going on!


Come on in...


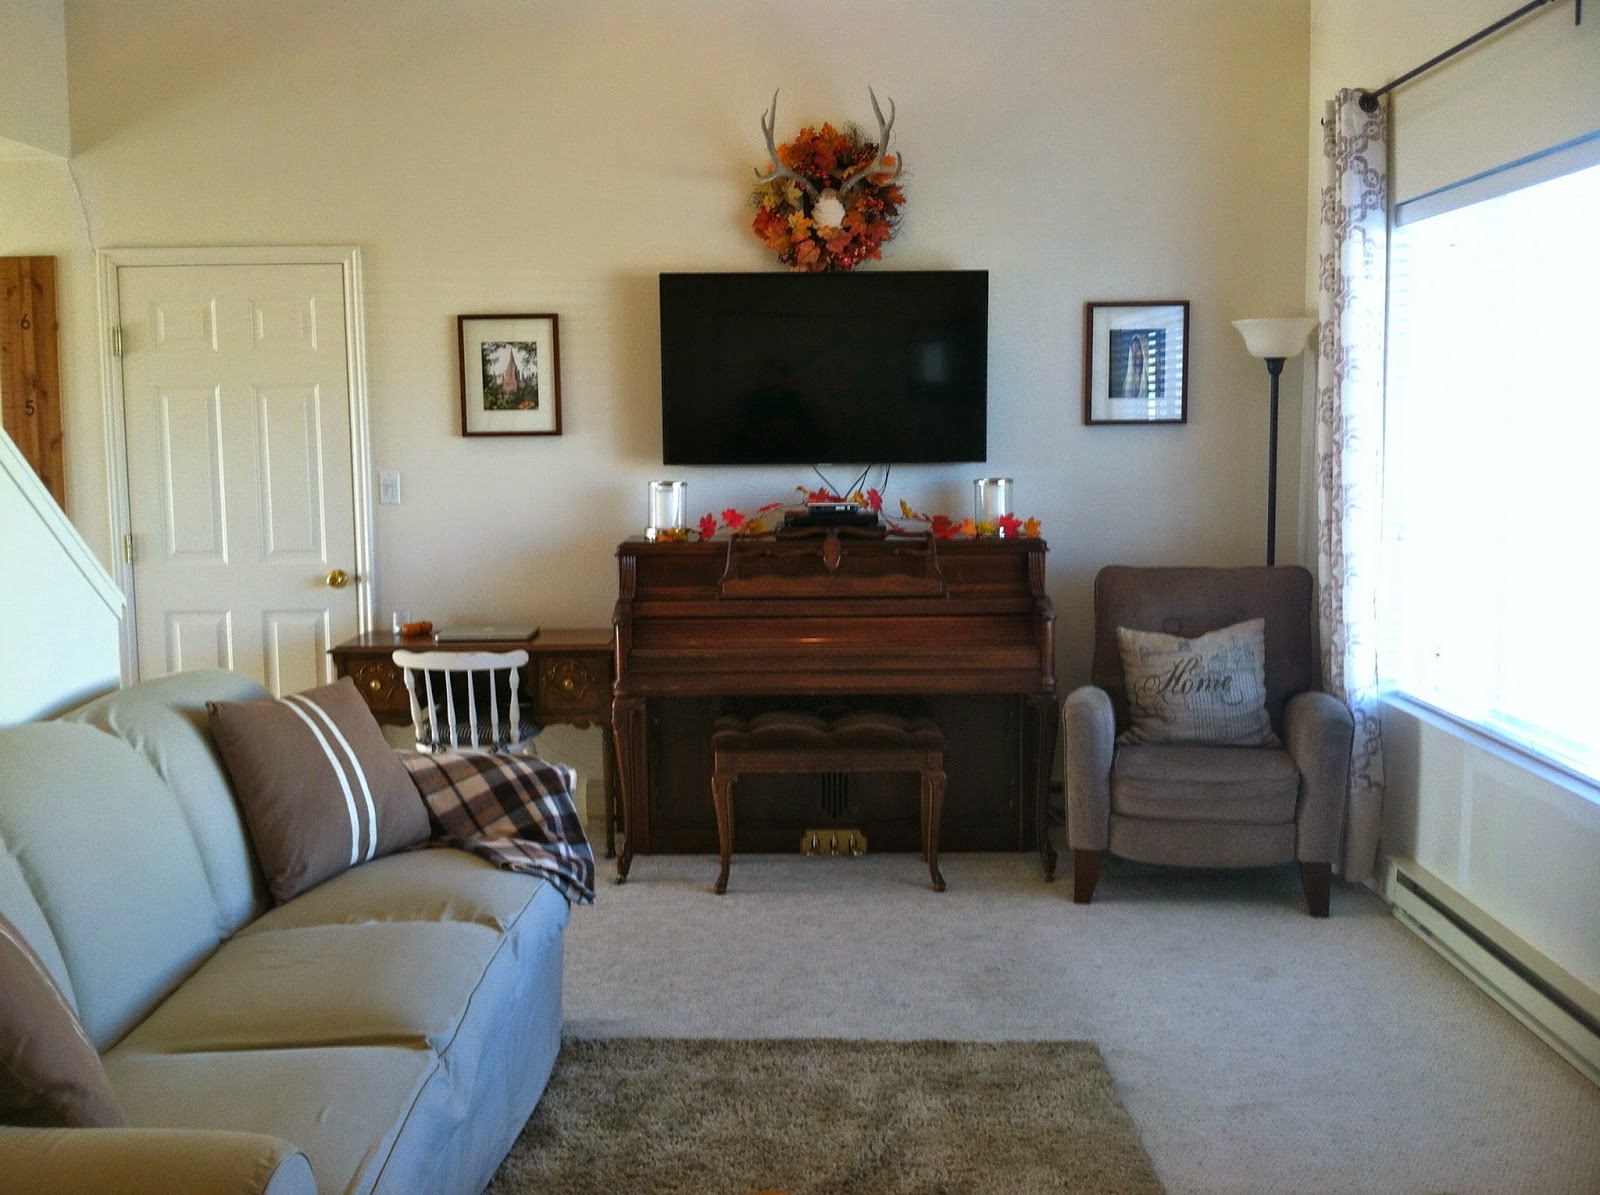
 Yes, I moved my furniture around AGAIN! But I swear I will never do it again, we just had to find the right placement and I think we finally nailed it! We have a long narrow room which has been tricky, but we really love this arrangement. It feels so much more "spacious" and I moved the {coffee table} between the sofas so there is plenty of room for playing and "wrestling". I love it so much that I bought a rug to put in front of the sofas cause I am never moving them again!


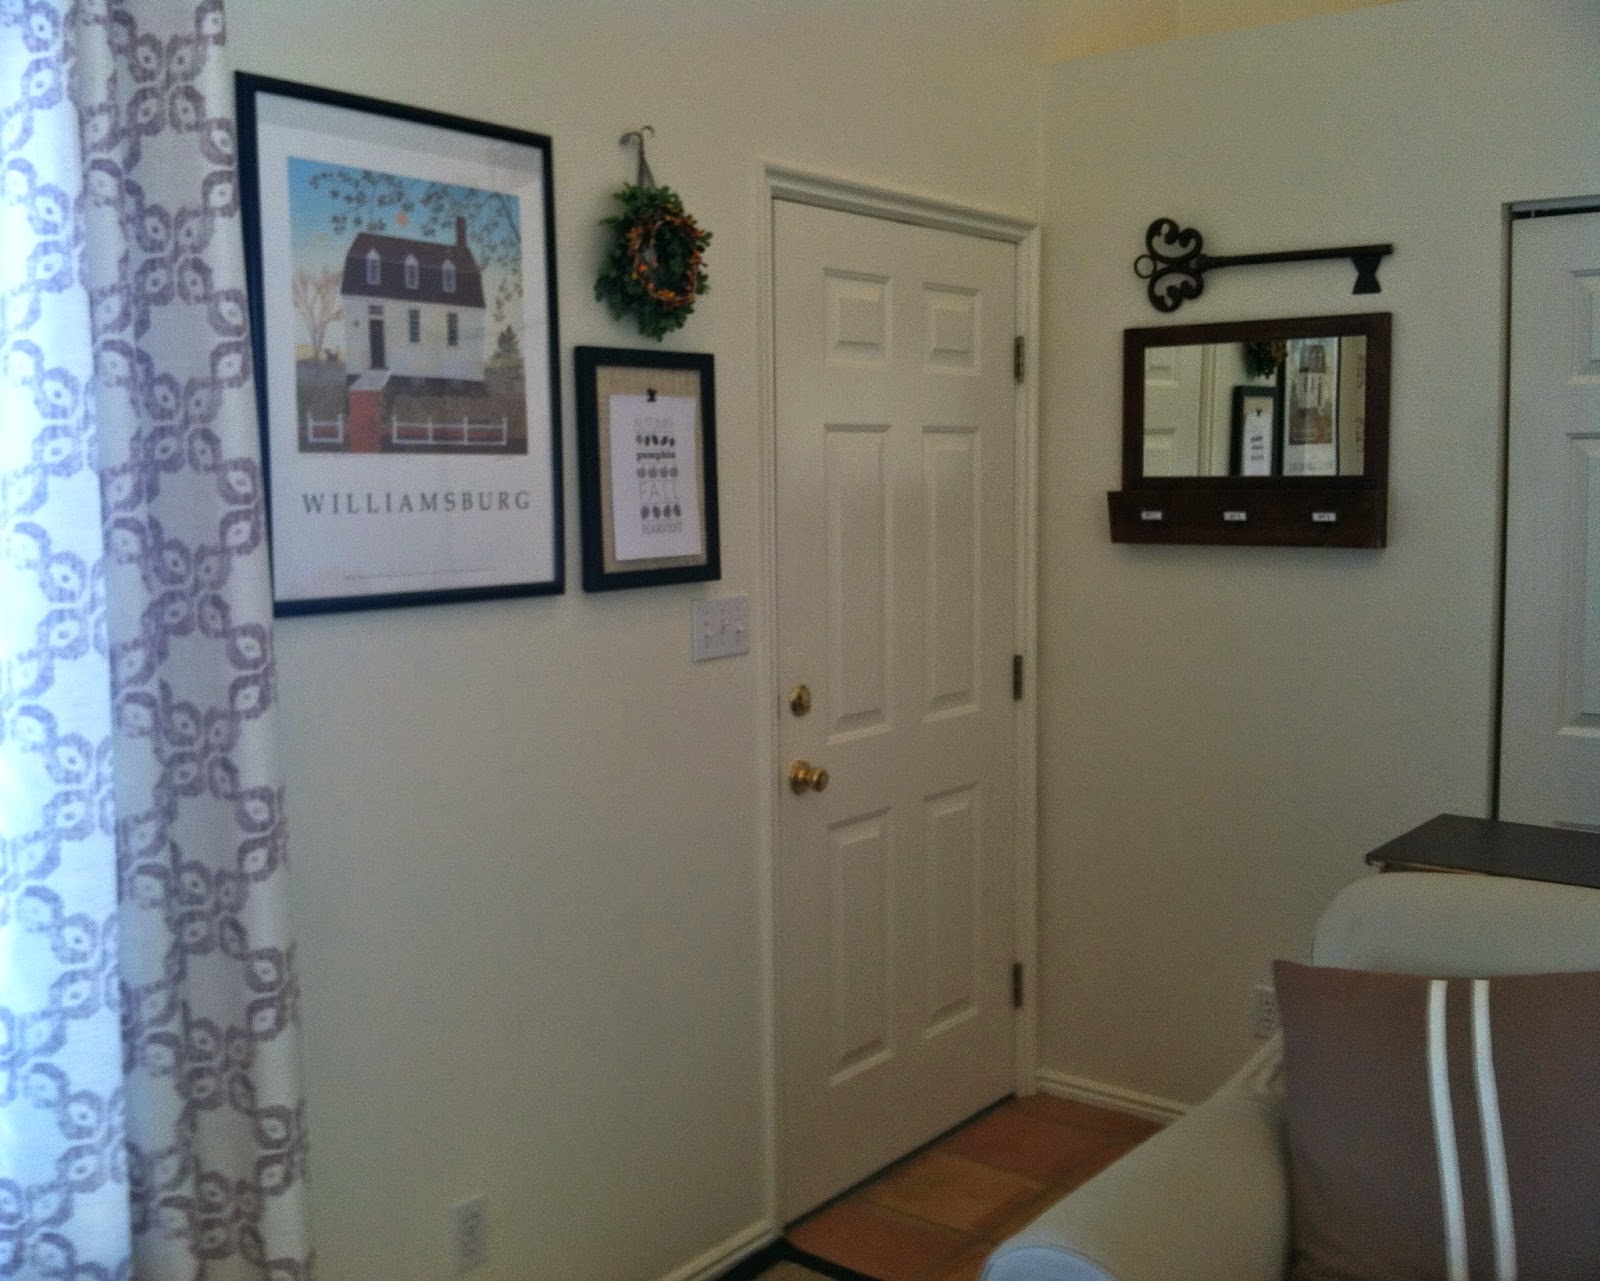
I found the free fall printable {here} for my burlap clip frame {inspiration and tutorial here}. I simply added some fall berry twigs to my mini boxwood wreath that I got on major sale with free shipping last year {from here}.
  You can see how I made my grain sack stripe pillow covers {here}.


  I love these faux pumpkins you can get at the craft store. I just keep them so I can re-use them year after year.


The rug is the Hampen rug from Ikea {found here} and it was everything I was looking for: relatively cheap, neutral, and shaggy :) The reason I wanted "carpet on carpet" is because we have a no-pile, white berber carpet that gets dirty easily and isn't the most comfy. I think it makes it feel more cozy in here for the upcoming colder months, too. Although it will be for all year 'round.


The lit branches were inspired by Pottery Barn and I got them on after-Christmas clearance at Target last year. The kids love the lights at night. Our {coffee table tray} holds good fall reads ;)


Love the wreath around the antlers! It's the perfect spot. To see my DIY mounted antlers, go {here}.


The only other thing I bought was this new plaid blanket from Ebay for $8, we are always needing more blankets on this couch and I love plaid especially in the fall. I love the way it looks with our fall decor.

A few pictures of the growth chart {we just made} so you can get a better look:


For the table runner I just used some wrapping paper I got in the Target dollar spot a year or two ago around this time of year:

{Chalkboard}.
  I hung a basket on the wall for a "shelf" to display some seasonal loveliness:


  And in my own little corner:

With {one of my favorite scents}:

  We also added a warmer quilt to the bedroom. I love this quilt, it was my "big" gift at my wedding shower.


Friday, September 19, 2014

The Friday Four Roundup #10 {Fall Home Decor and Waffle Cookie Recipe}

1. I finally got out the fall decorations! Mostly because my kids kept asking me when we were going to decorate. Here is a sneak peak of an arrangement I made for the front porch:


2. When I had the waffle iron out after I made waffles this week, I decided to get the most use out of it before I put it away and made one of my childhood favorite cookies. Have you ever made cookies with a waffle iron? The kids think it's super fun!

Chocolate Waffle Cookies
1 c. sugar, 1/2 c. margarine, 2 eggs, 2 c. flour, 1/2 c. cocoa, 1/2 c. milk, 1 tsp vanilla, 1/4 tsp baking powder. Cream together sugar, margarine and eggs then add the remaining ingredients. Mix well. Drop by teaspoonfuls onto hot waffle iron. Close and bake 1-2 min. Cool completely then frost with icing. (I put about 3 in each square). Makes 3 - 3 1/2 dozen.
Peppermint Icing
1/3 c. margarine softened, 1 1 /2 c. powdered sugar, 1 TB milk, 1/4 tsp pure peppermint extract. Mix together all ingredients until smooth and creamy.


There were some fall home tours this week. It's always interesting to see inside other people's homes and how they decorate and their different styles.

3. To see the Finding Fall home tours click HERE.

4. To see the Eclectically Fall home tours click HERE.

Happy Weekend! ~ Rebecca

Sunday, September 14, 2014

DIY Wood Ruler Growth Chart (A Pottery Barn inspired no cost to me project!)

I have wanted one of these for awhile. Last week my 8 year old Ikea bed frame kinda fell apart (oops) so we had several large wood boards that we didn't want to throw away. My husband actually came up with the idea of repurposing one of them for the growth chart I've been wanting. Not only was it already the perfect size, but it was already stained. Woot! (They sell them for $100 here). This project was going to cost me $0! So I got to work.

I started by getting out a large ruler and figuring out where I wanted to mark the lines, how big to make them, and what font I wanted to use for my numbers.


I marked it every inch the entire length.


Then I drew a line with a sharpie about 1 inch long with every third line being 2 inches long and every foot mark 3 inches long.


For the numbers, I decided on one of my favorite fonts, Century Graphic in size 200. I printed and cut the numbers and used them as stencils, tracing onto the wood with a pencil, then filling in with the sharpie.

123
456


And then.... I hung it up! LOVE IT! Can't wait to measure and mark my kids' growth on it and keep it forever ;)


Have a GREAT week.
~Rebecca